Approved sender list for responding to enquiries via email
Manage who can receive and reply to conversations for your pets listed sent via email!
PetRescue’s approved sender list feature allows Group Admins to provide individuals outside of PetRescue with access to reply to email conversations.
How it works:
When a potential adopter enquires about a pet - PetRescue sends an email notification to the assigned contact of that pet listing (as well as the owner of the listing if switched on - see here). Our platform allows these individuals to simply click ‘reply’ and respond to the enquiries received via this email notification without having to log into their PetRescue account.
To ensure member accounts are safe, adopter's information is secure, and enquiries are received by the most current intended recipient - we have added an extra layer of security so that only PetRescue account holders and previously approved senders can respond to these enquiries.
What this means is - if a notification of a new enquiry happens to reach an unknown email or perhaps a past volunteer whose contact details are still listed on the profile, they will only be able to respond without logging in to the platform if they have a PetRescue account linked to your group or if their email is listed on your organisations’ approved sender list.
The below bounce-back email will be received if the recipient does not have a PetRescue account, is not listed as the contact on the pet listing, or is not an approved sender.
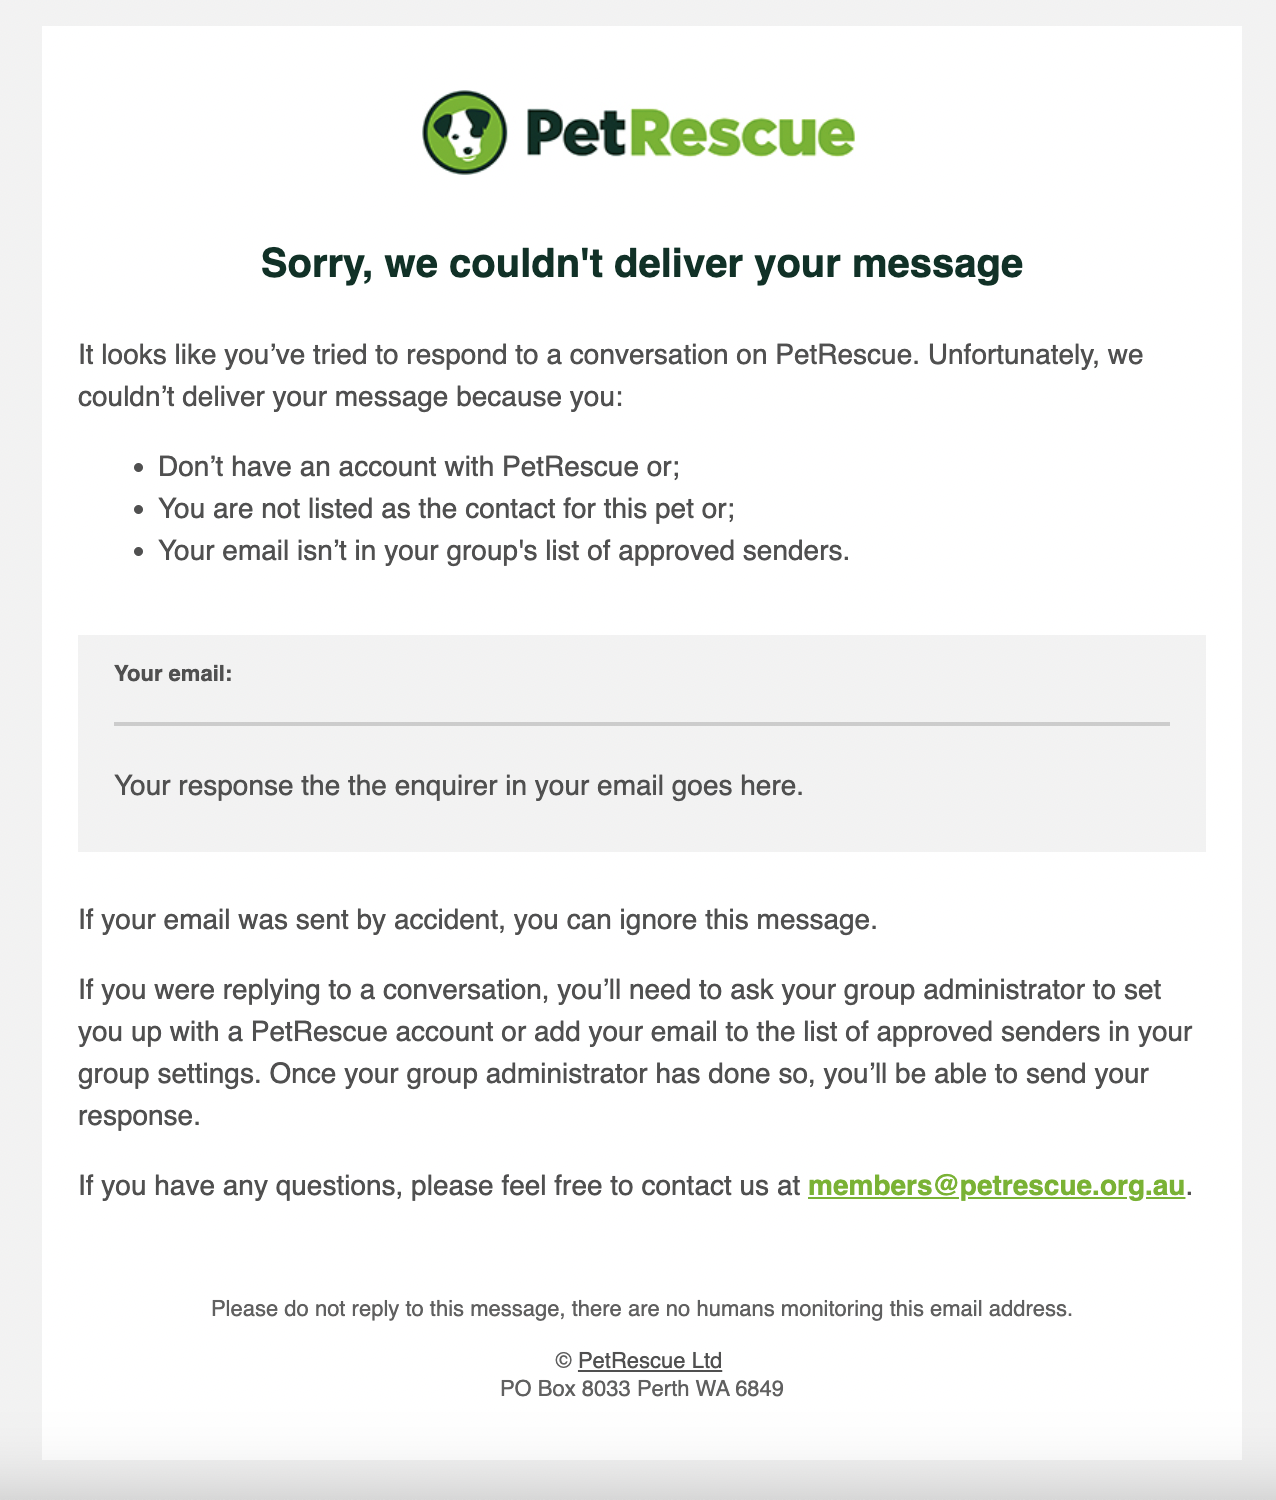
Once individuals have been added to the approved sender list, they will be able to respond to the enquiry.
Find out how to add contacts to your approved sender list below.
Manage your Approved Sender List:
For associates who do not have a PetRescue account but may need to respond to enquiries for pets on your organisation’s behalf, you can add them to your approved sender list.
To add individual emails to your approved sender list:
- Log in to your Admin account
- Go to ‘My Group Profile’
- Click on ‘Edit’
- Scroll down to the Permission Settings section and click to expand
- You will then find the Approved sender list box as pictured below:
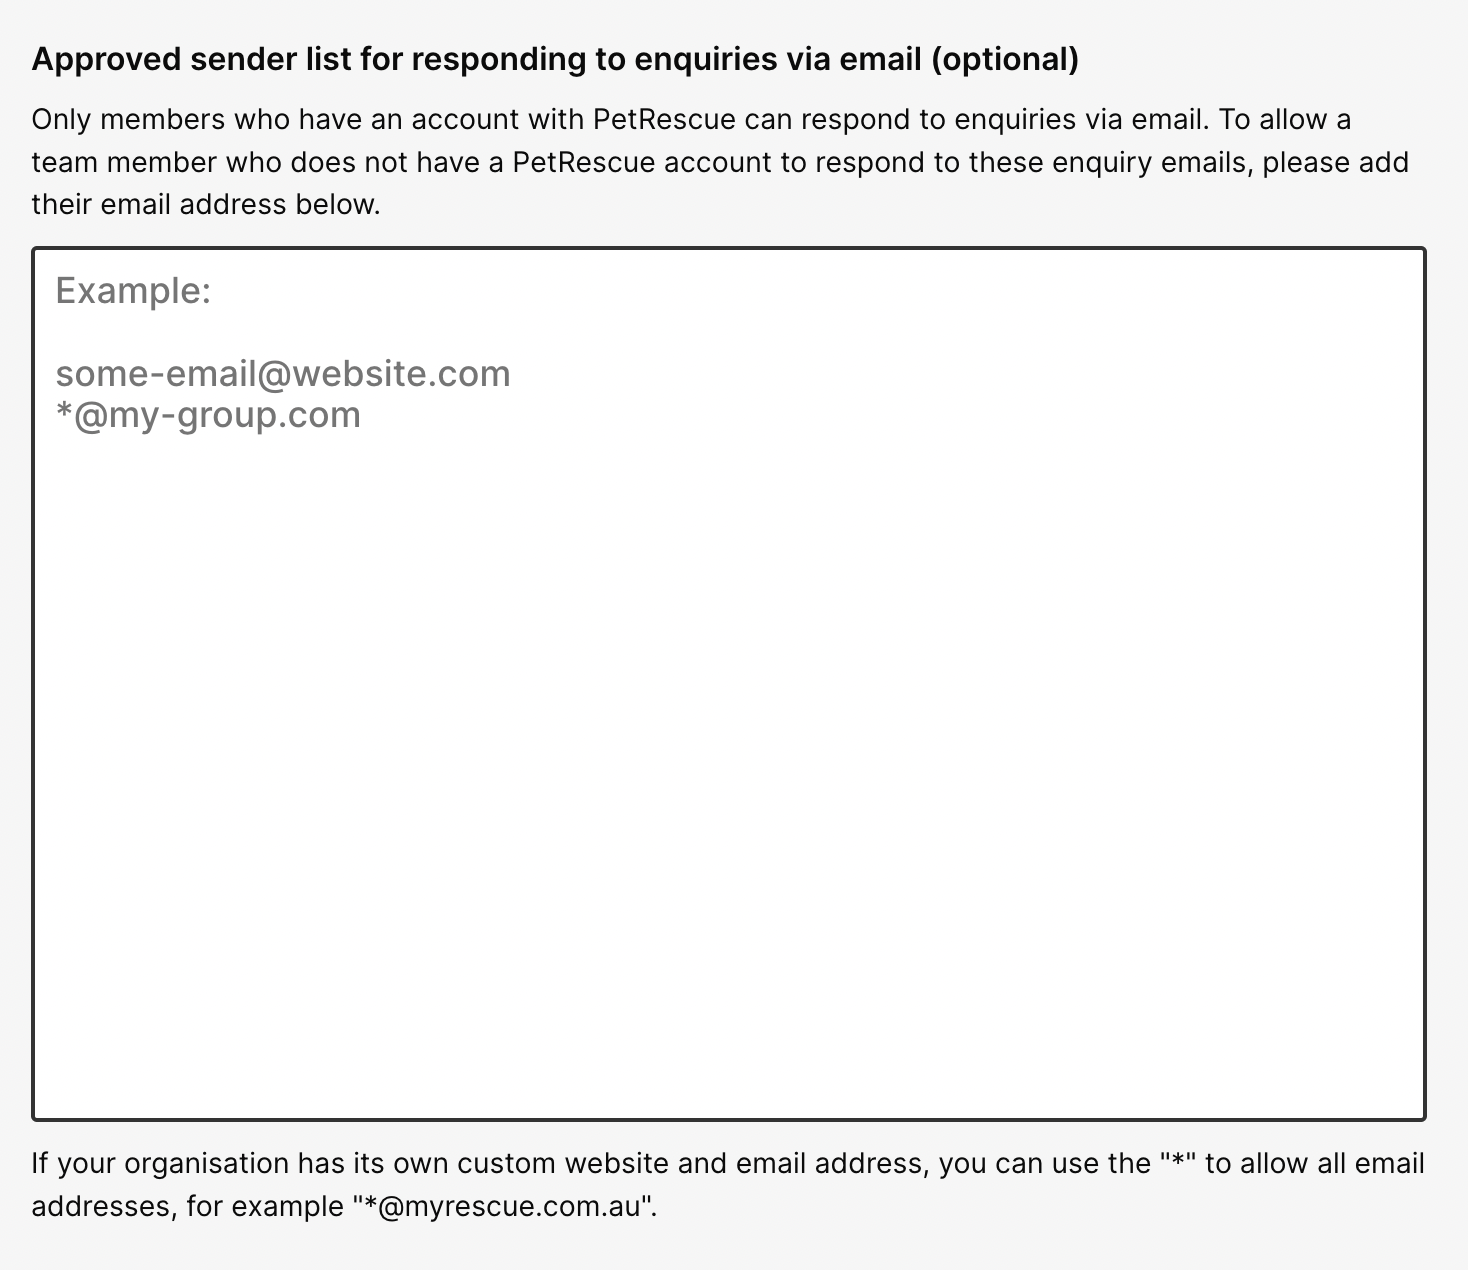
Add in the team member's email address individually or your custom/domain email using the * option on separate lines, as referenced in the image above (below the text box).
Once you have added the relevant email address/s, be sure to scroll to the bottom of the page and click ‘Update’.